21 Shafts and rafters
structural issues
elevator shaft
framing
cost
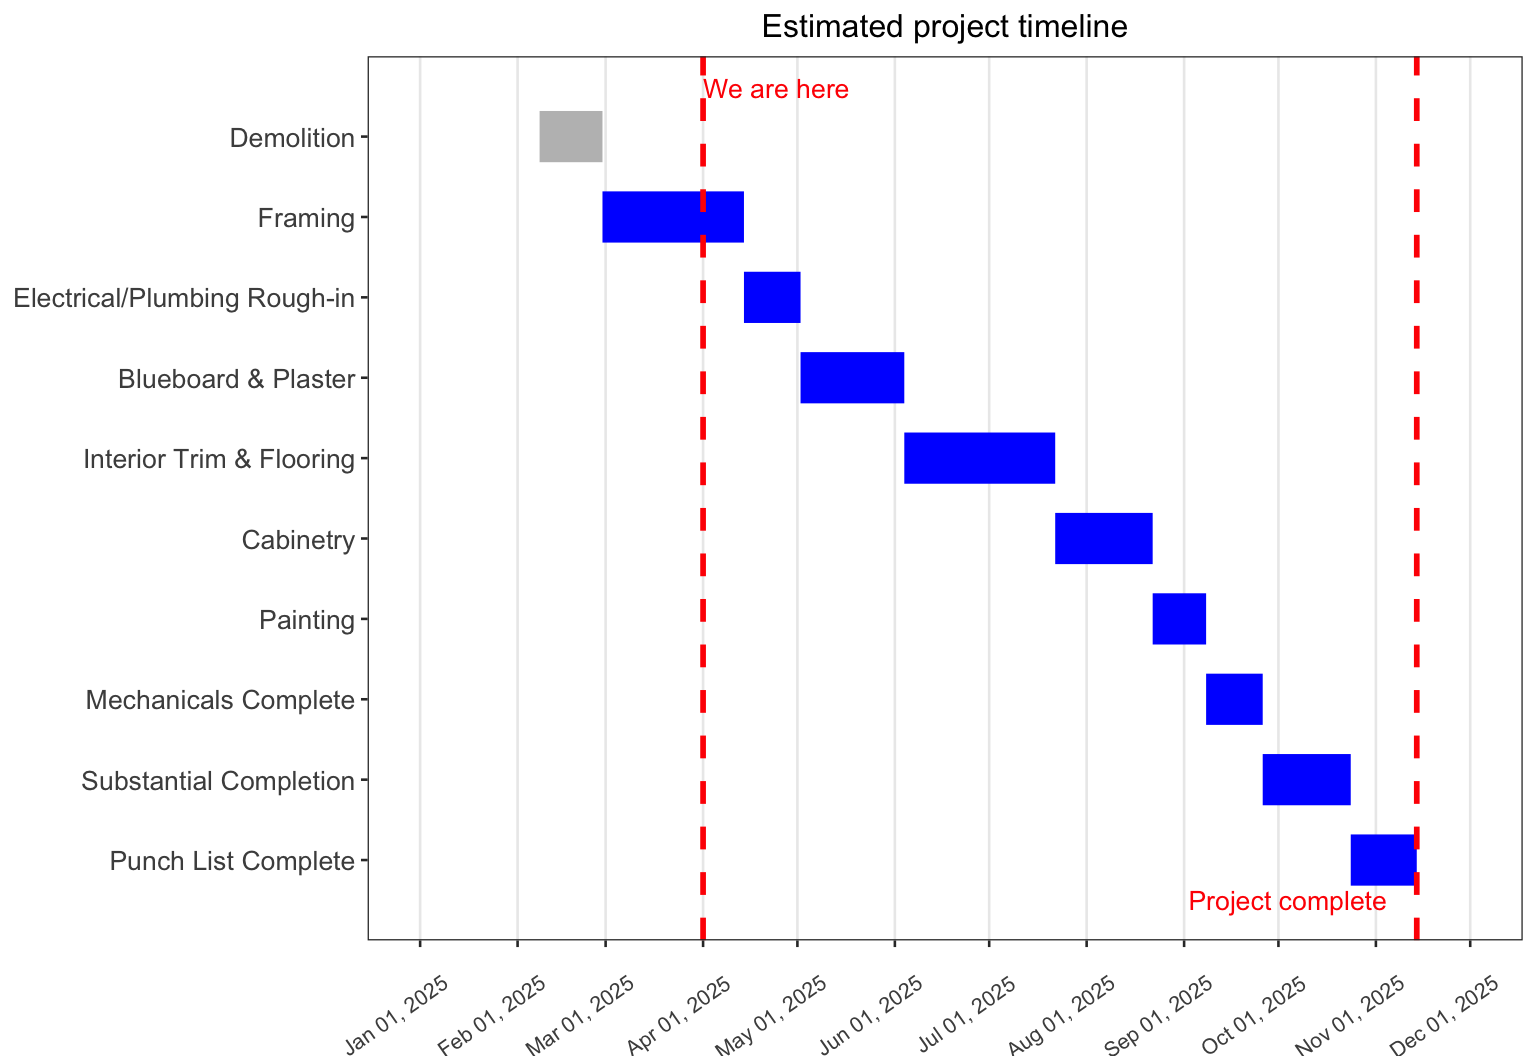
schedule
April 2025
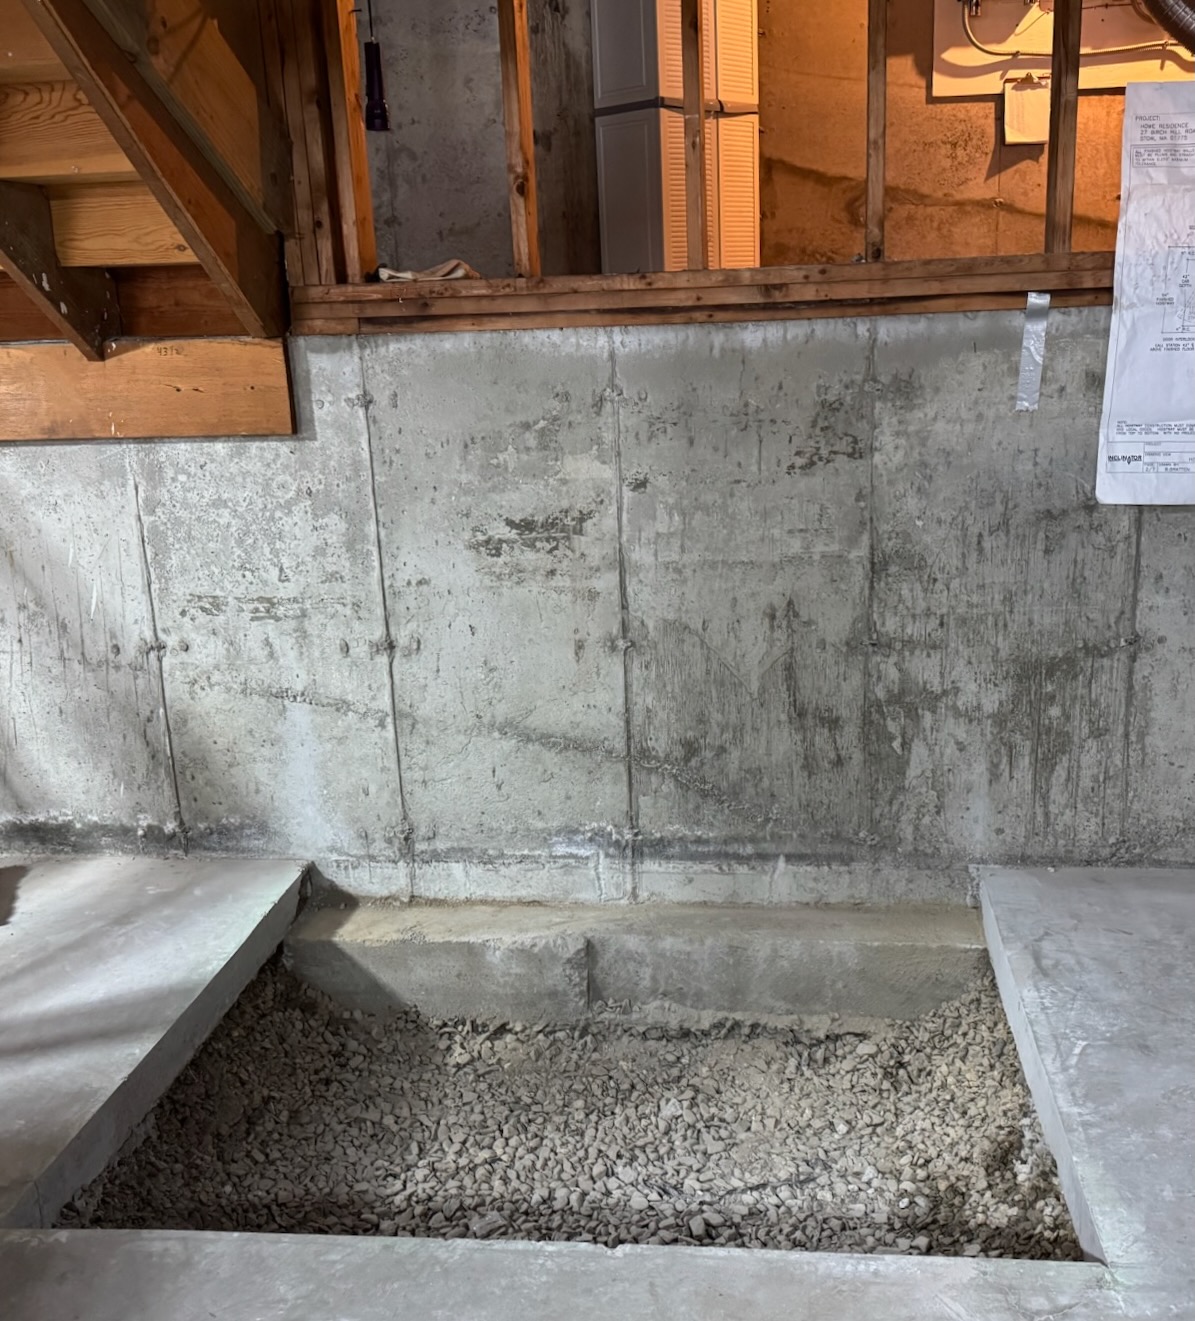
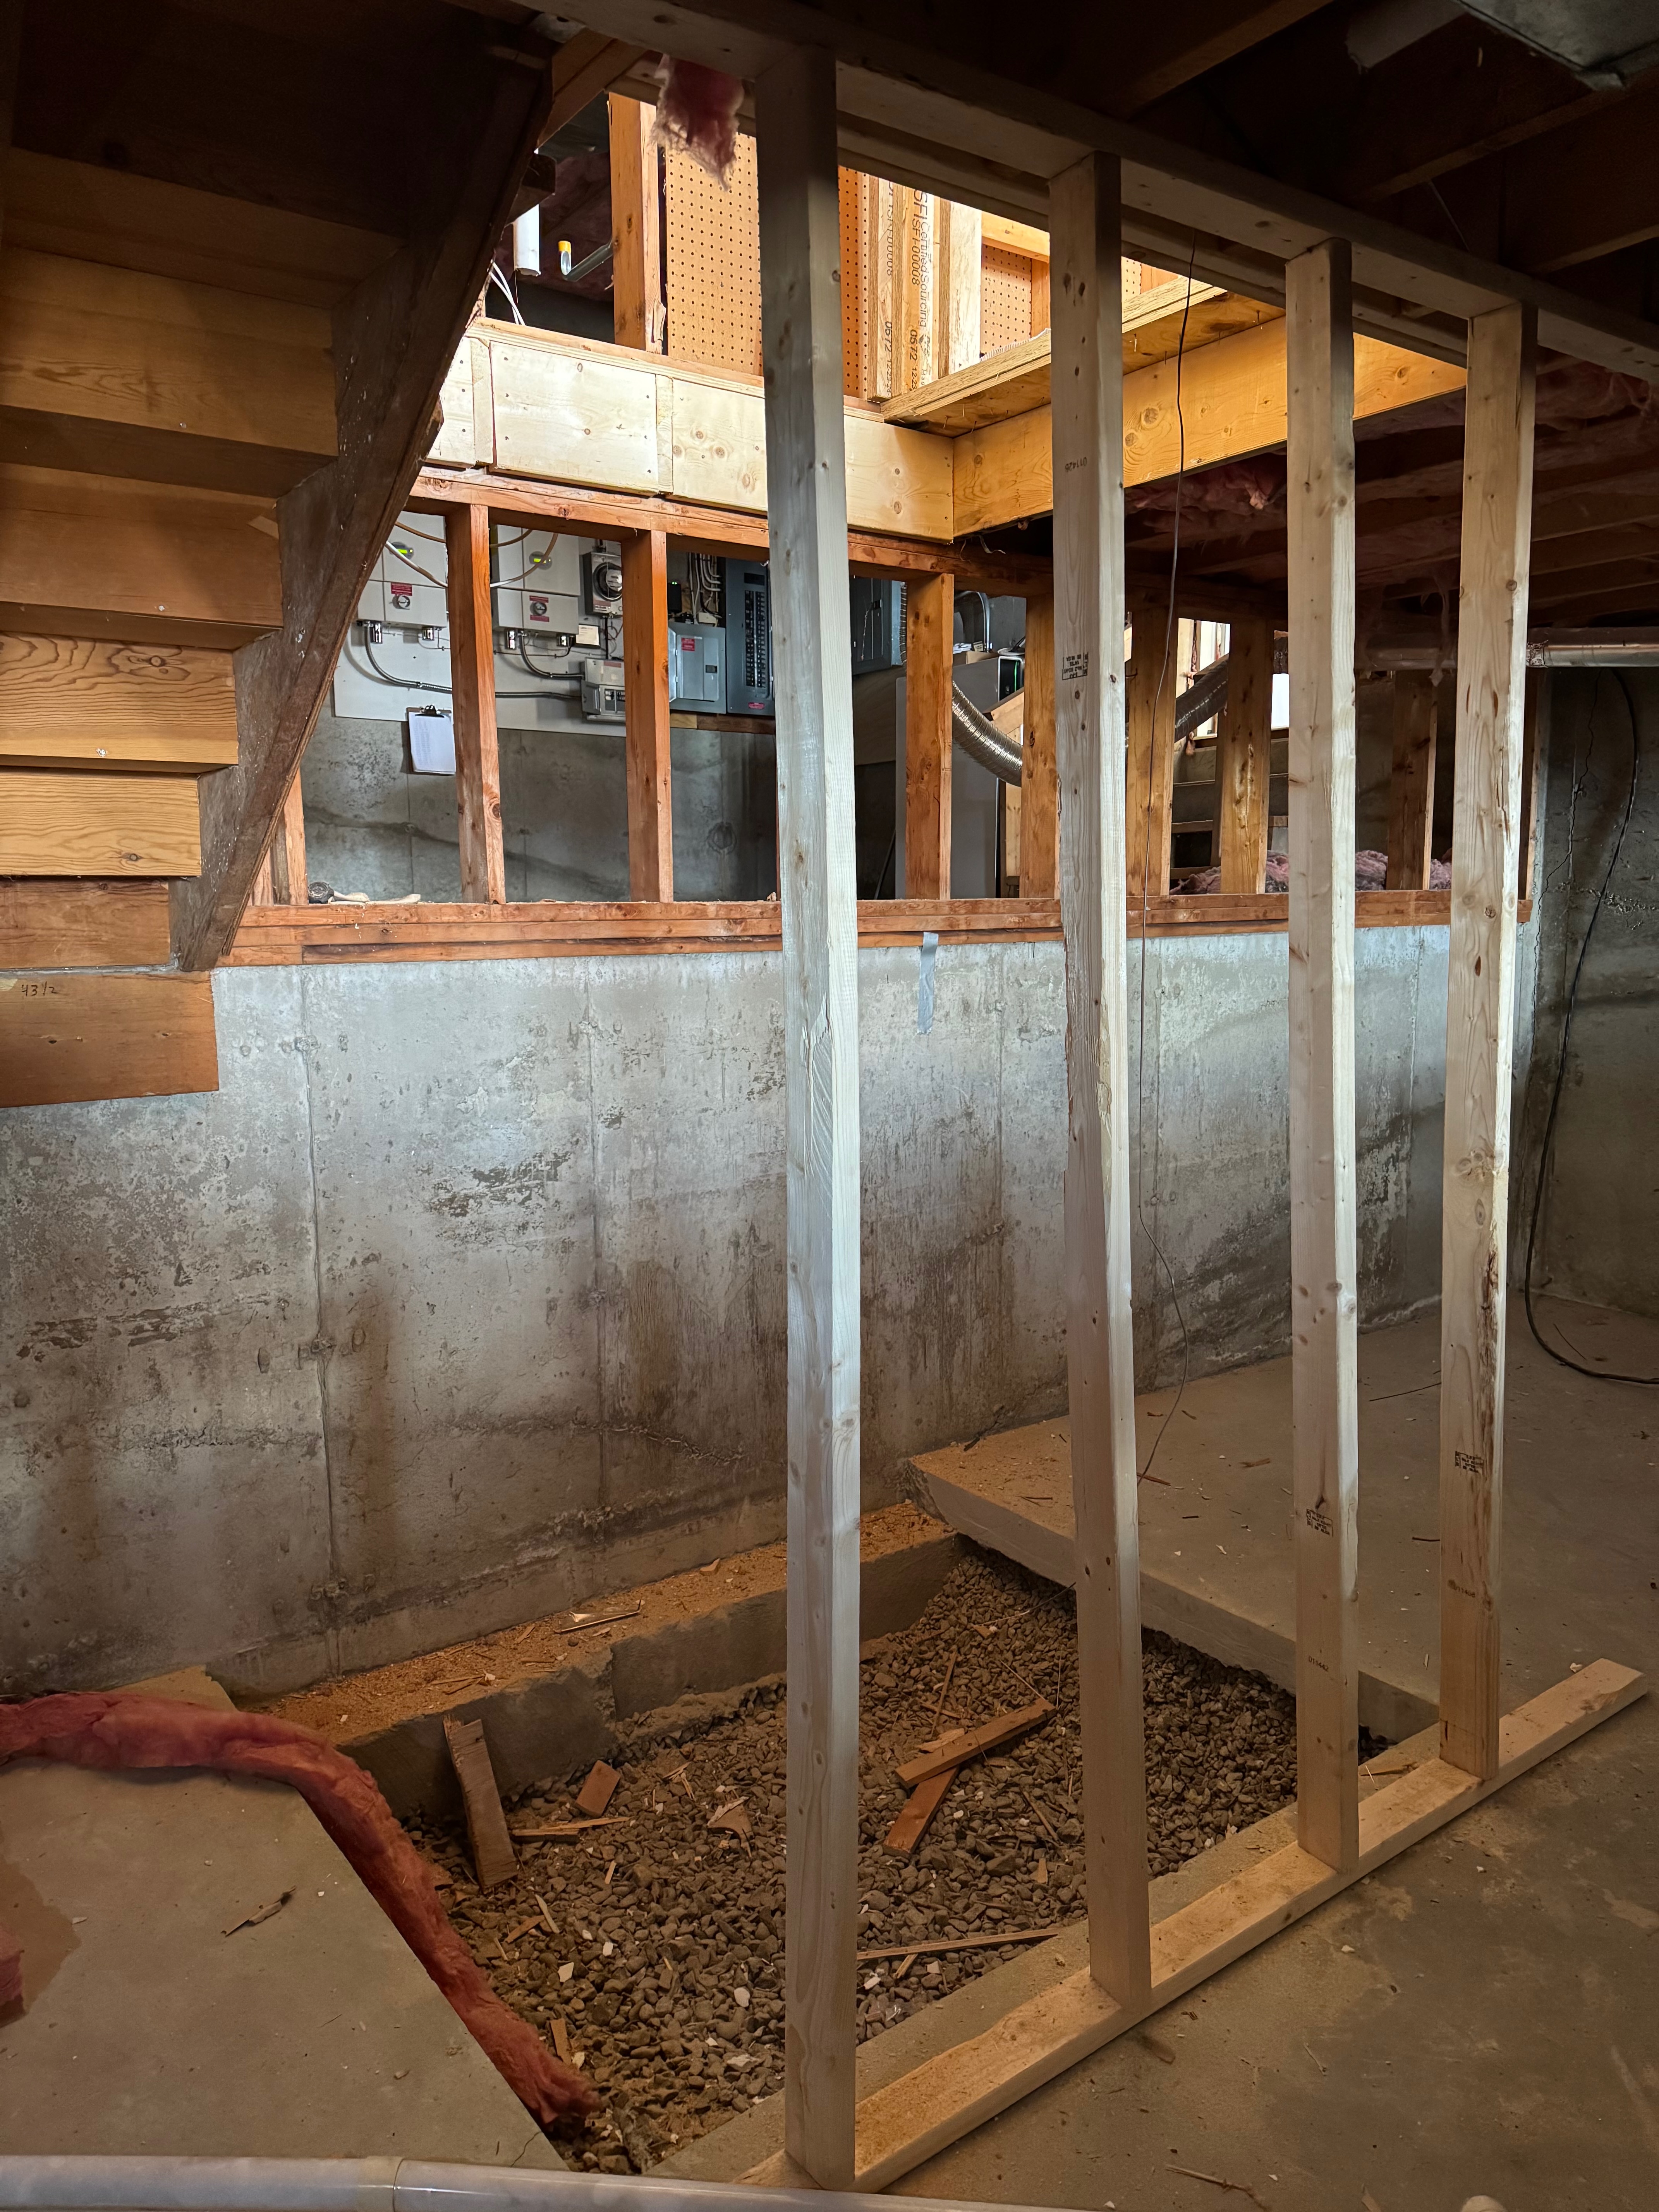
Kris has started framing the elevator shaft, which is on the critical path for our project schedule. His team has already dug an elevator pit in the concrete in our basement. Fortunately, the Incinator elevator doesn’t require a very deep pit, so that work went very quickly as you can see below.
Framing the elevator shaft, though, is no small feat. They have to frame the shaft so that there’s no more than 1/4 inch variation from the top to the bottom of the 30-foot shaft. This is my first introduction to Laminated Veneer Lumber or LVL, which is the type of lumber Gilmore is using to achieve such tight tolerances in the elevator shaft.

As you can see, LVL is constructed of layers of wood held together with adhesives, rather like plywood in dimensional lumber form. The nice thing about LVL is that it’s stronger, straighter, and more stable than traditionally milled lumber and therefore ideal for achieving the tight tolerances of our elevator shaft. And now that Kris has used it to frame the giant hole that he has cut through the center of our house, the result is as much art as craft. My favorite photo of the shaft is on the cover of this book.
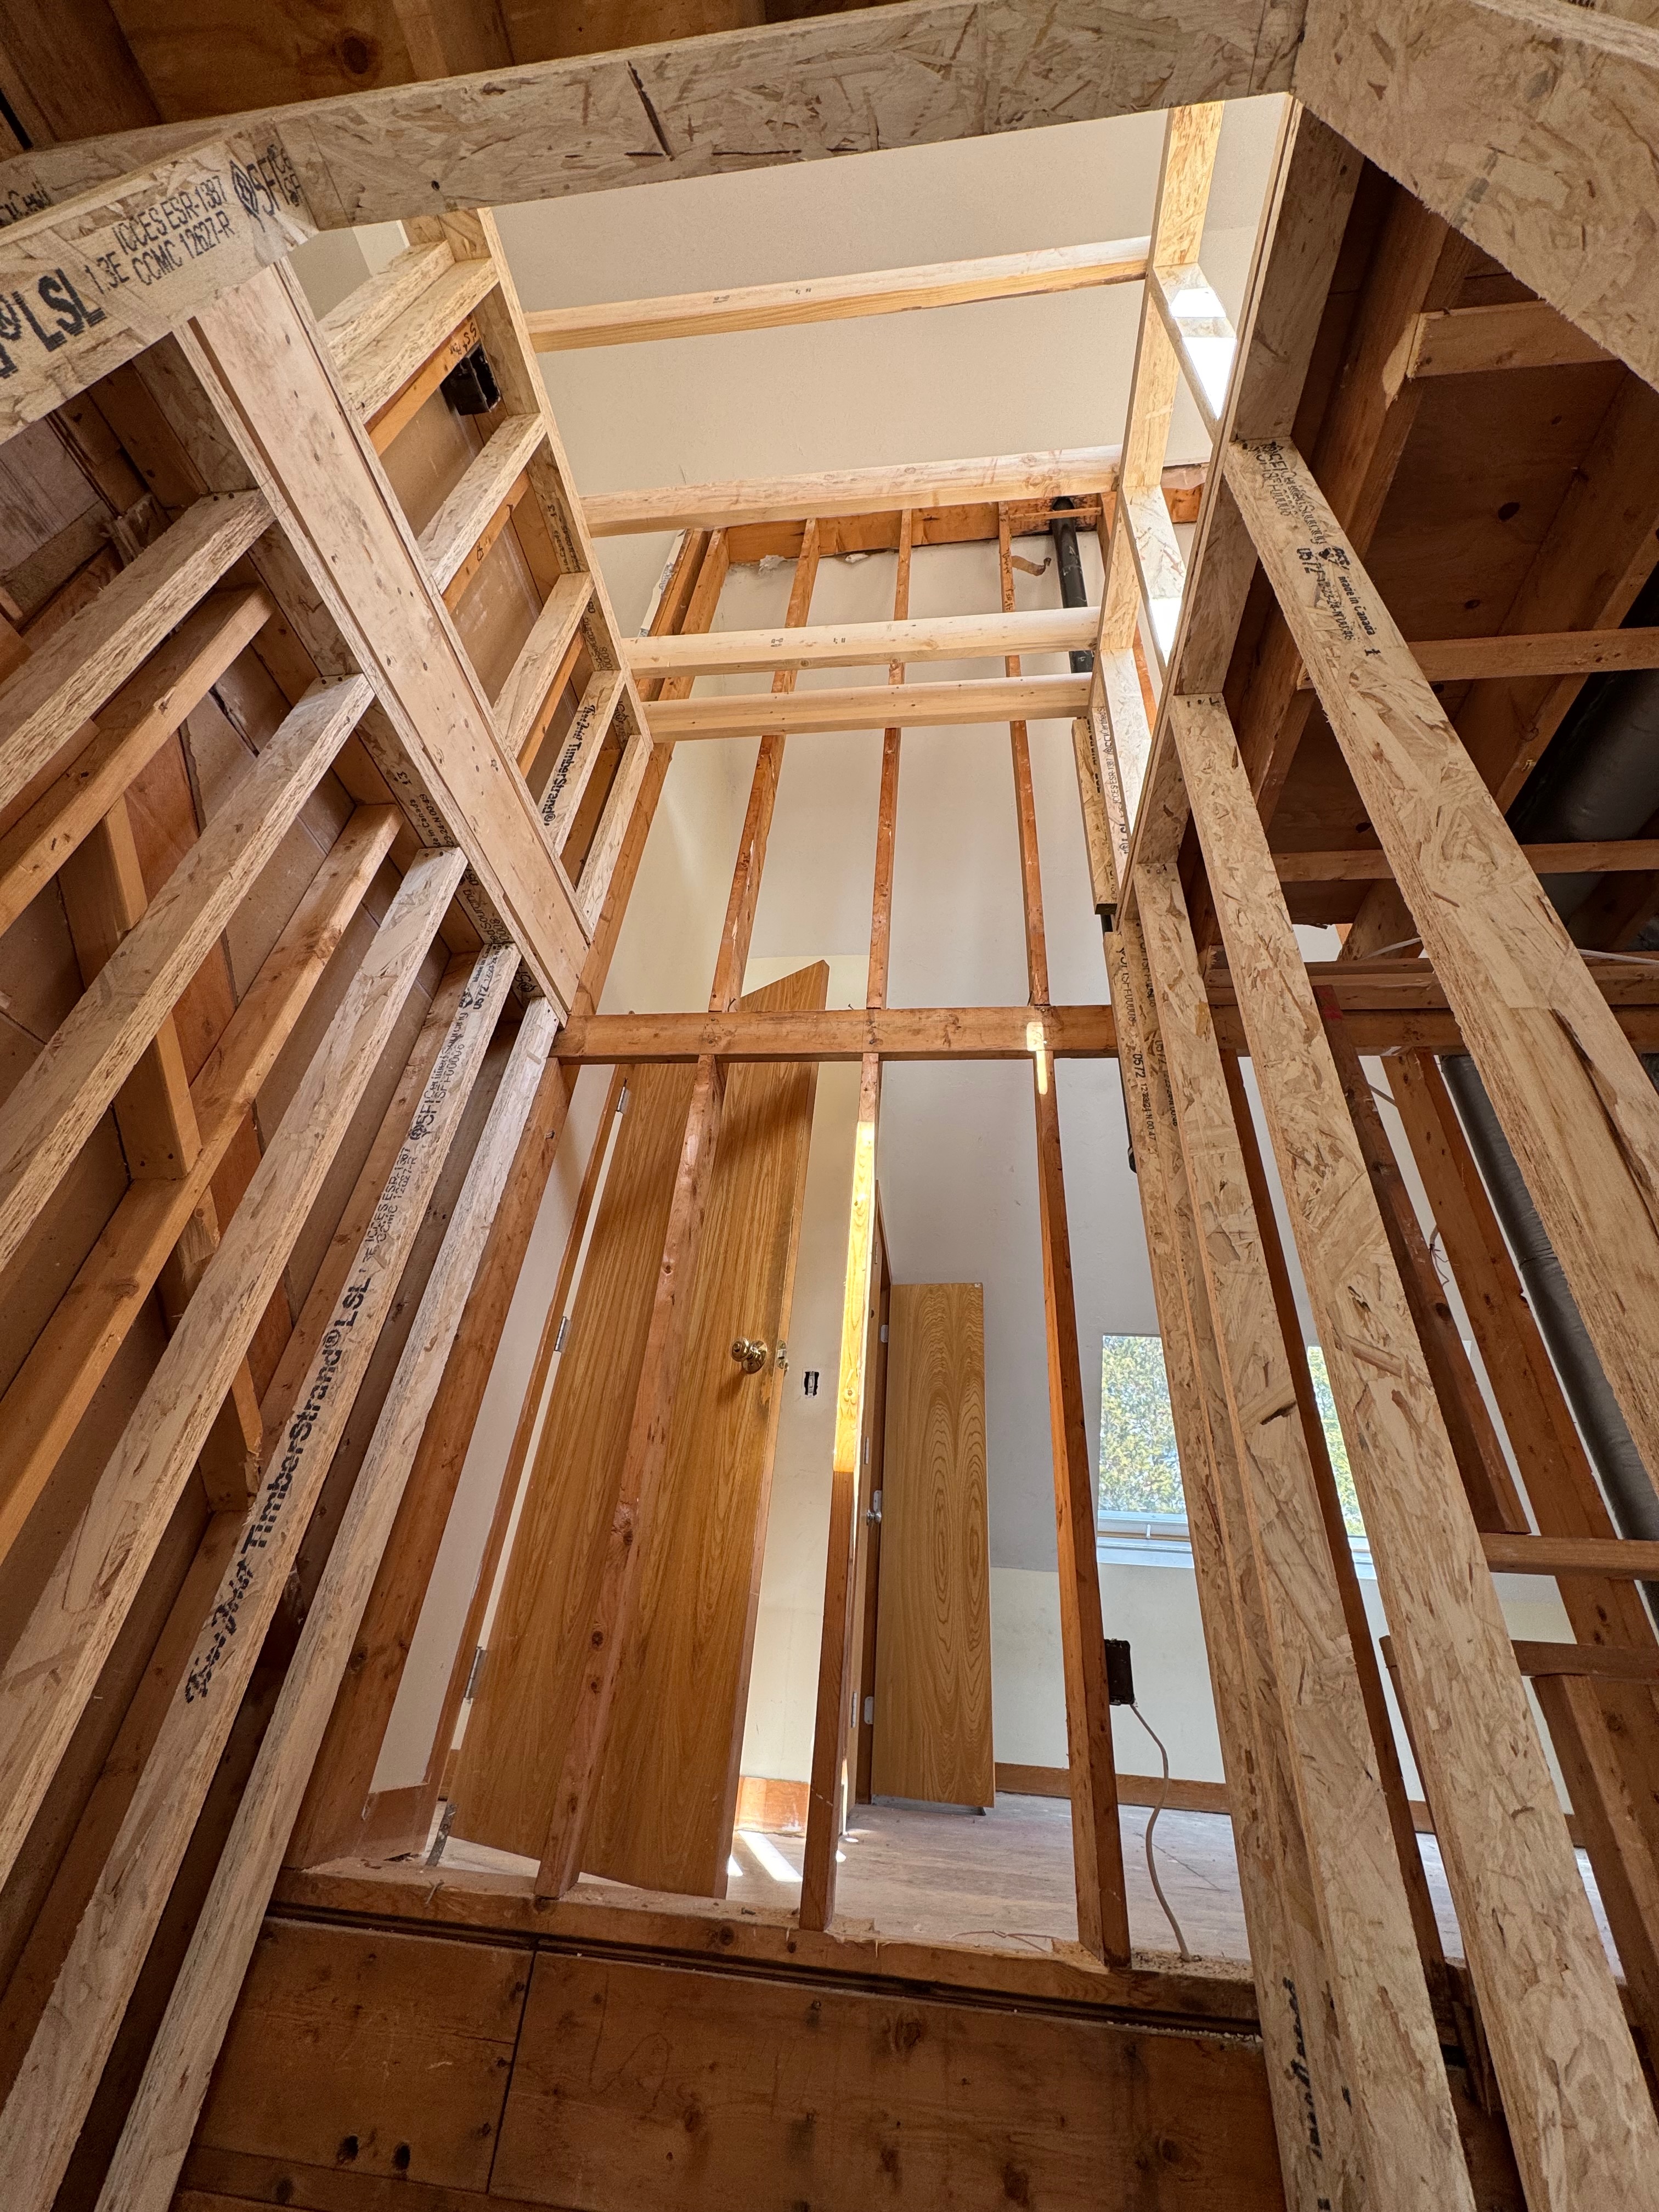
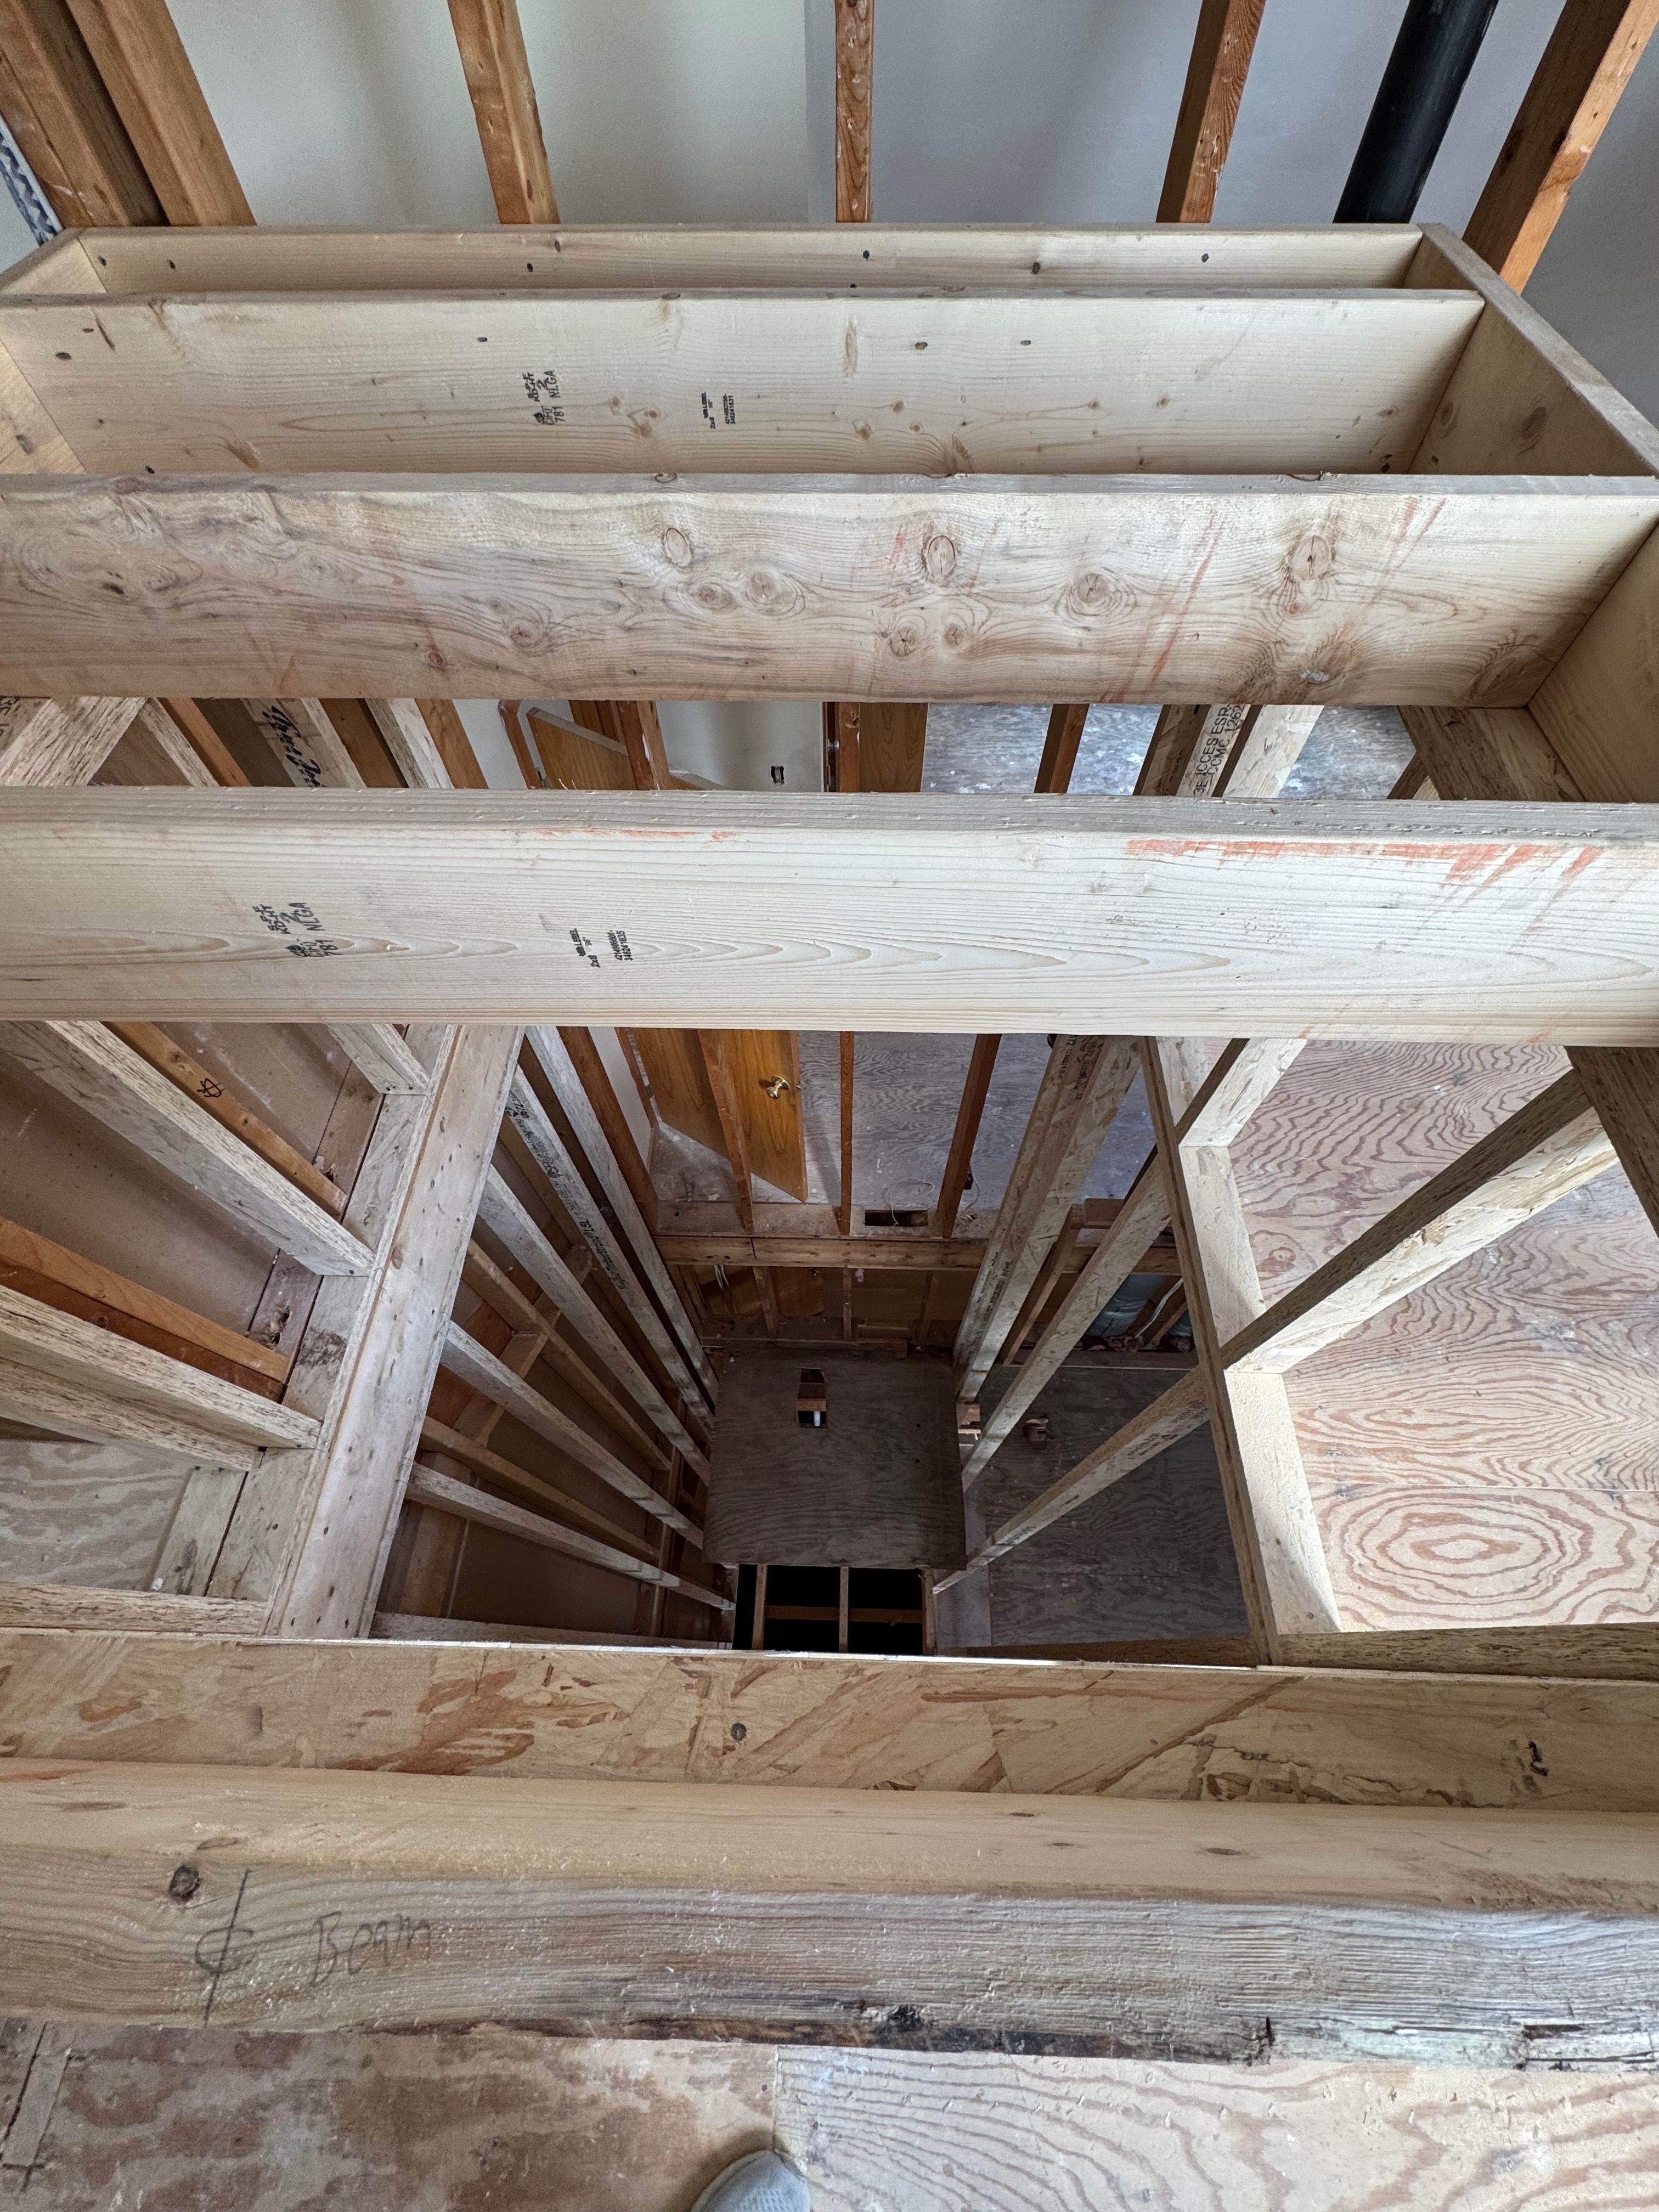
So the elevator shaft is coming together. That’s the good news. The bad news is that we’ve encountered our first show-stopper. With the drywall now removed from our bedroom roof, the construction team has made a discovery: our bedroom has no ridge beam, as you can see in the photo below:
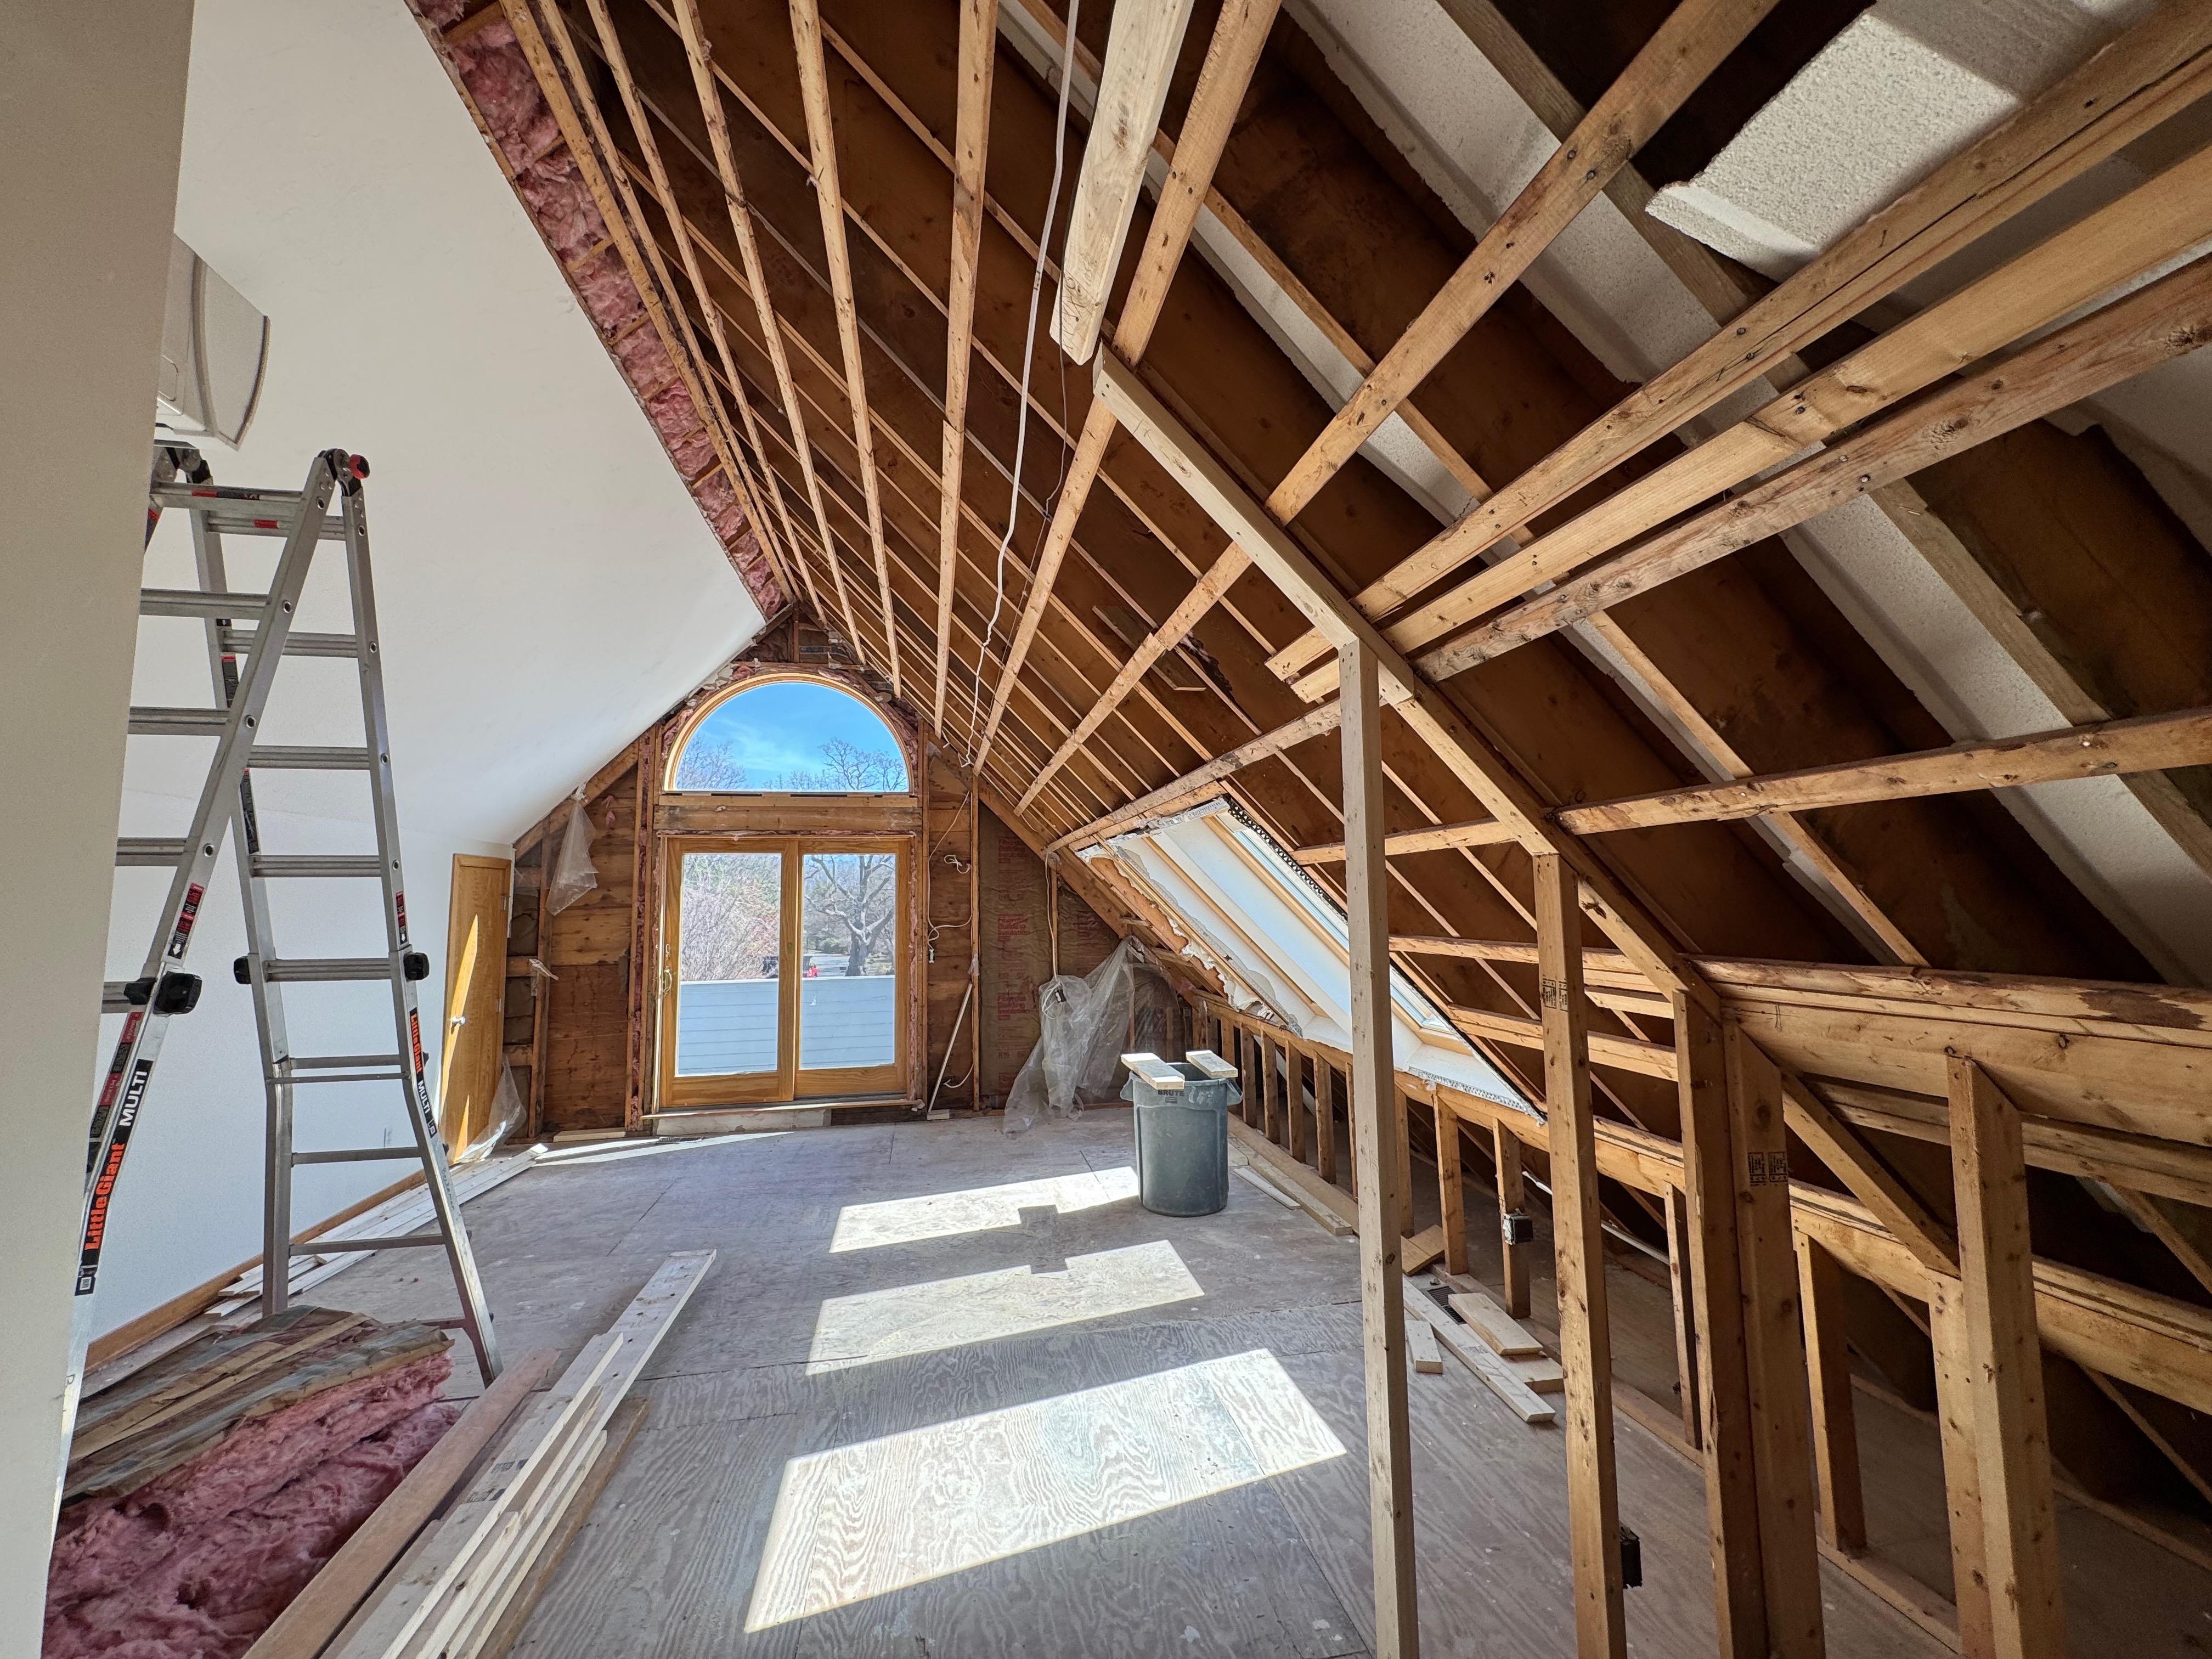
The rafters that hold up the roof on south side of the house are just nailed to the rafters on the other side of the house. Therefore, all of the weight of the roof is transferred to the side walls by the rafters. And while those rafters are strong enough to hold the current roof, they aren’t nearly strong enough to hold the shed dormer in the new design, especially given that we’ll have to cut through some of those rafters for the dormer.
Oops.
And the news actually gets worse. If we open up the other side of the roof and the far wall to investigate the structure further, we may find further surprises. An interesting quirk of the building code is that if you don’t touch part of the existing structure, it’s allowed to stand as is. However, if you do start to modify it, the modified version must meet the current building code.
So our options at this point are as follows:
- Don’t change anything in the bedroom. If we were to give up modifying the bedroom, we could just put the ceiling drywall back up and move on. This is clearly the lowest-cost option. In fact, it would avoid all the cost of the shed dormer, so it might even reduce the project cost overall.
- Install a smaller shed dormer. Our current design calls for a pretty big shed dormer with a 3-panel sliding glass door and a balcony. If we were to scale back that design to something more modest, the current structure might support this addition. However, we’d need the structural engineer to sign off on that, and we’re not sure he would be happy with that.
- Add a ridge beam. This would require opening up the roof and the far wall, removing the Palladian window at the end of the bedroom, and installing a big LVL beam along the top of the roof. We’d then add a vertical beam structure over the glass doors at the end of the bedroom to transfer the weight of the roof along new support beams that would be installed in the garage. This would allow us to keep the existing shed dormer design.
The good news is that we can take a week or two to think about this before it really starts delaying our project. Carolyn and I have no idea what the right thing to do is. Our big challenge is that we have absolutely no gut feel for how much mitigating this problem is going to cost. Because we don’t know what we’re going to find when we start cutting into the far wall, the ridge beam addition might cost $15,000 or it could cost $150,000. We just don’t have enough information.
We’re going to have to ask for some help to figure this out.